Today is my first Design Team project for Kiwi Lane Designs. Every other Friday, they feather a Weekend Whimsy project on the blog - showing how to use Designer Templates in home decor, accessories, etc.
For my project, I decided to attempt a banner. Nothing like trying to do something for the first time for your first ever Design Team project!!! But I'm glad I did. I am not one to decorate much for Valentine’s Day around the house, but I decided
I want to try to do a banner for it this year.
Authentique’s Lovely was perfect for making a “Love” banner!
I started with a Fancy Pants Chipboard Banner – Half Circle
as a base. As I went through my 6x6
Lovely pad, I started picking out the papers I wanted to use. There are a lot of beautiful designs in this
collection. The reds and pinks are so
vibrant, that I decided to cut the L-O-V-E out of balsa wood on my Cricut so the
colors of the papers would stand out. A
little ink to highlight the edges of the letters and viola!
I used Adorn 3B
to create the scalloped edges. The other
elements are die-cuts from Lovely, with the exception of the heart which is
from Tim Holtz.
I have to say, when I saw the Keynote paper, I wanted to do
a “You hold the key to my heart” element.
I was so excited to see Authentique had included just this saying in
their die-cuts. So after cutting Keynote
with my Adorn 3A template, I found a
key in my embellishment collection and tied it all to the “O”. I highlighted the Adorn cut with some silver
Stickles. The red background is actually
leftover Christmas tissue paper Modge Podged onto the chipboard.
I went to town with Adorn
2A, cutting strips from various papers and lining them up on the
chipboard. I used Tags 1 to anchor my
Authentique die-cut and added a few pearls and a cabochon - which is one I really thought I would never use, but here it is! (I am not one for black flowers.)
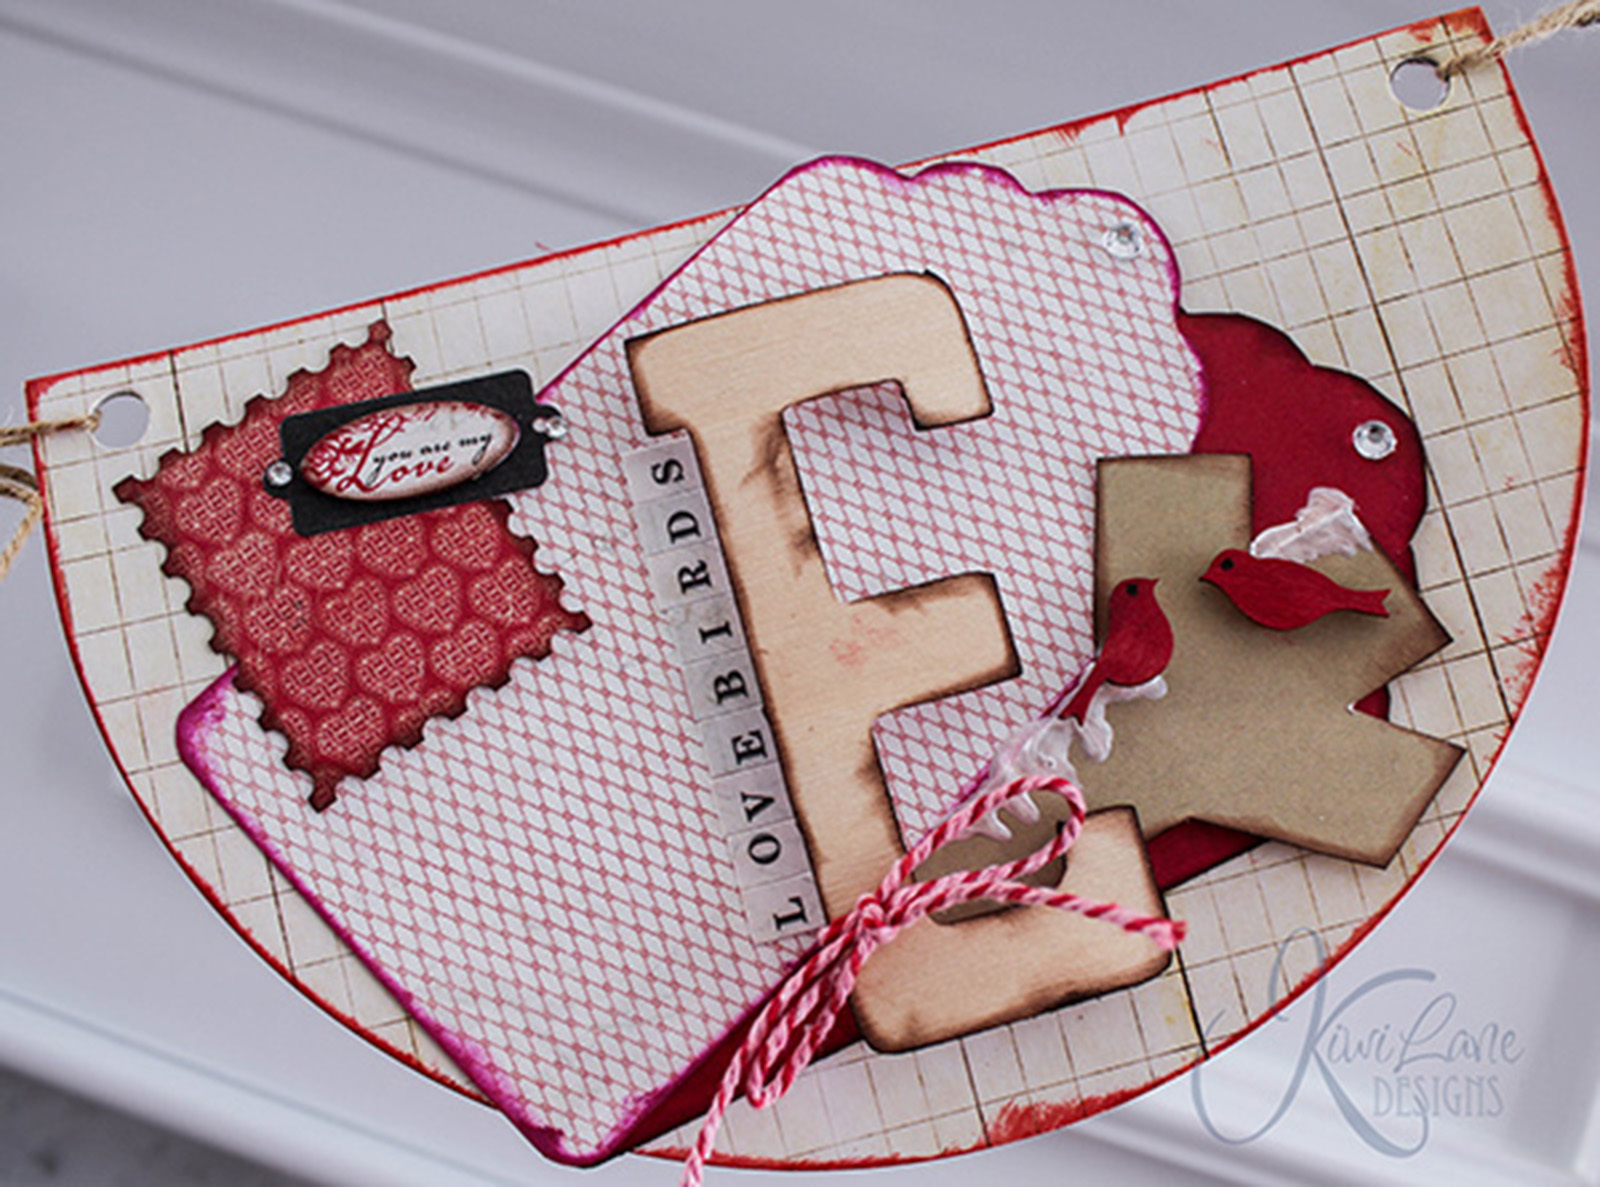
Can you spot the Winter
2 template? Those two little love
birds are sitting on one branch of the snowflake. A little Liquid Pearls added a touch of "snow" on the branch. I also used Tag 7 as a background for the chipboard. One thing I love about Authentique’s die-cuts
is that have patterned paper on the back of each one. The stamp element is one of their die-cuts,
simply flipped over.
I used Paisley Place 2A
to make the flowers on the L and the V banner.
I cut a 12” strip paper from Authentique’s older collection, Uncommon. After rubbing it along a table to make the
paper soft, I sprayed them with a little Glimmer Mist (to help make them wet
and add a little shine – though I think a lot of that shine ended up on my
hands) and started rolling them. I
quickly learned that I the best thing to do was add a little fold into the
paper to help it wrap smoothly. A little
pink Glimmer Mist sprayed directly in the center of the flowers gave them a
little more pop.
I hope you enjoyed my Weekend Whimsy and I’ve inspired you
to try making a banner of your own. I have a little challenge to you - grab something you thought you would never use - and USE it - as I did with my banner and the black cabachon.
Cheers!
Kristy


You rocked that first DT project! WTG!
ReplyDelete